Nowadays, videos edited on the song “Choliya Ke Hook Raja Ji” are trending heavily on social media, with creators using different styles of editing and going viral. If you also want to make your own eye-catching video with this trend, this article will help you do exactly that. Here, I’m sharing a ready-to-use CapCut template that makes video editing quick and easy. Even if you have no prior editing experience, you can still create a professional-looking video in just a few minutes. All the effects, transitions, and timing are already set in the template—you just need to add your clips. In this article, I’ll guide you step by step through the entire process, so make sure to read it till the end and try the template for yourself.
Details Of Choliya Ke Hook Raja Ji Capcut Template
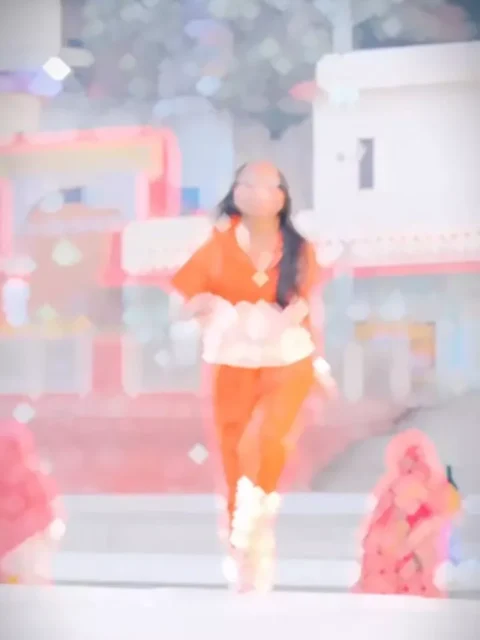
Friends, let me first explain the style of this trending video editing and what kind of effects are used in this template. The editing is not overdone; instead, it has a realistic and clean look. This is mainly a slow-motion–based video, where most of the scenes play smoothly in slow motion. The video begins with a clip of a girl singing along to the song, but don’t assume this template is only for girls—both boys and girls can use it easily. As the video progresses, the clip changes to a walking shot, which is shown in smooth slow motion, giving it a stylish and confident feel. The template also includes subtle glowing effects, clean transitions, and smooth motion throughout the video. Overall, slow-motion effects are used consistently to enhance the attitude vibe. If you want to create an attitude or swag-style video, this template is perfect. You just need to add your own slow-motion walking clip, and the editing will be completed automatically.
What type Of clips we need to add?
Friends, using CapCut templates comes with many benefits. The biggest advantage is that you can edit your videos like a professional editor, even if you have no editing experience at all. Everything works automatically, which saves a lot of time and effort. Videos that normally take hours to edit can be completed within just a few minutes using templates, without doing any manual editing. This is why most people prefer templates—they simply add their clips, and the entire editing process is handled automatically. Nowadays, creators want fast results without complicated editing, and templates make that possible. All the latest and trending social media editing styles are easily available in template form. So, if you want high-quality, professional-looking videos in a short time, using CapCut templates is the best and easiest option.
Note: Certain CapCut templates might not work in some regions because of the app’s own limitations. If the template button doesn’t open, try again after some time or access it directly through the official CapCut app. This external link will take you to the original CapCut template in a new tab. We are not connected to CapCut in any way; all rights belong to their respective owners. We only share these links to make things easier for users.
How To Use Capcut Template
To perform this editing, you’ve received the template link, but you don’t know how to use this CapCut template. So, in this paragraph, I’m explaining it to you step by step in a very easy way. If you read and follow these steps, your editing will be complete. It’s a very simple process. Let’s find out.
Step 1: First, you need to click on the “Check Template” button below the image and open it in CapCut.
Step 2: If you don’t have CapCut, this template link won’t work. For this, first install the latest official version of CapCut on your phone.
Step 3: Then you can open the template directly in CapCut.
Step 4: Here you will see a preview video of this template, and below it, you will see a “Use” option.
Step 5: Click on it, and you will go to your phone’s gallery. Here you need to add your clips.
Step 6: Add as many clips as needed. Then click on the “Next” button and wait for a few moments.
Step 7: If the template has slow motion, wait until it’s complete.
Step 8: Now your edited video is ready. You can save it if you want.
Step 9: To do this, click on the “Export” button in the upper corner and save your video from there.
Step 10: You can also customize the video quality according to your preference.
This way, your trending video will be ready.
Conclusion
So friends, this is how you can create trending video edits using your own photos, and this tool will make your video look just like those trending videos. I’ve also explained the process to you, and I hope you understood everything. I hope you liked this article. If you want to create and edit more videos on new trending topics, then visit our website. Here you will find tutorials on new trending videos, which will help you learn editing and create your own videos. If you liked the article and my explanation, please share it.